Magnetic Levitation Device
September - October 2019
Project Overview |
Developed Skills |
||
|
|
|
|
Objective
This project was part of my technical skills practicum course MECH 220 and was done in the MECH machine shop and the MECH electrical lab facilities at UBC. The MagLev device was manufactured according to given drawings and diagrams.
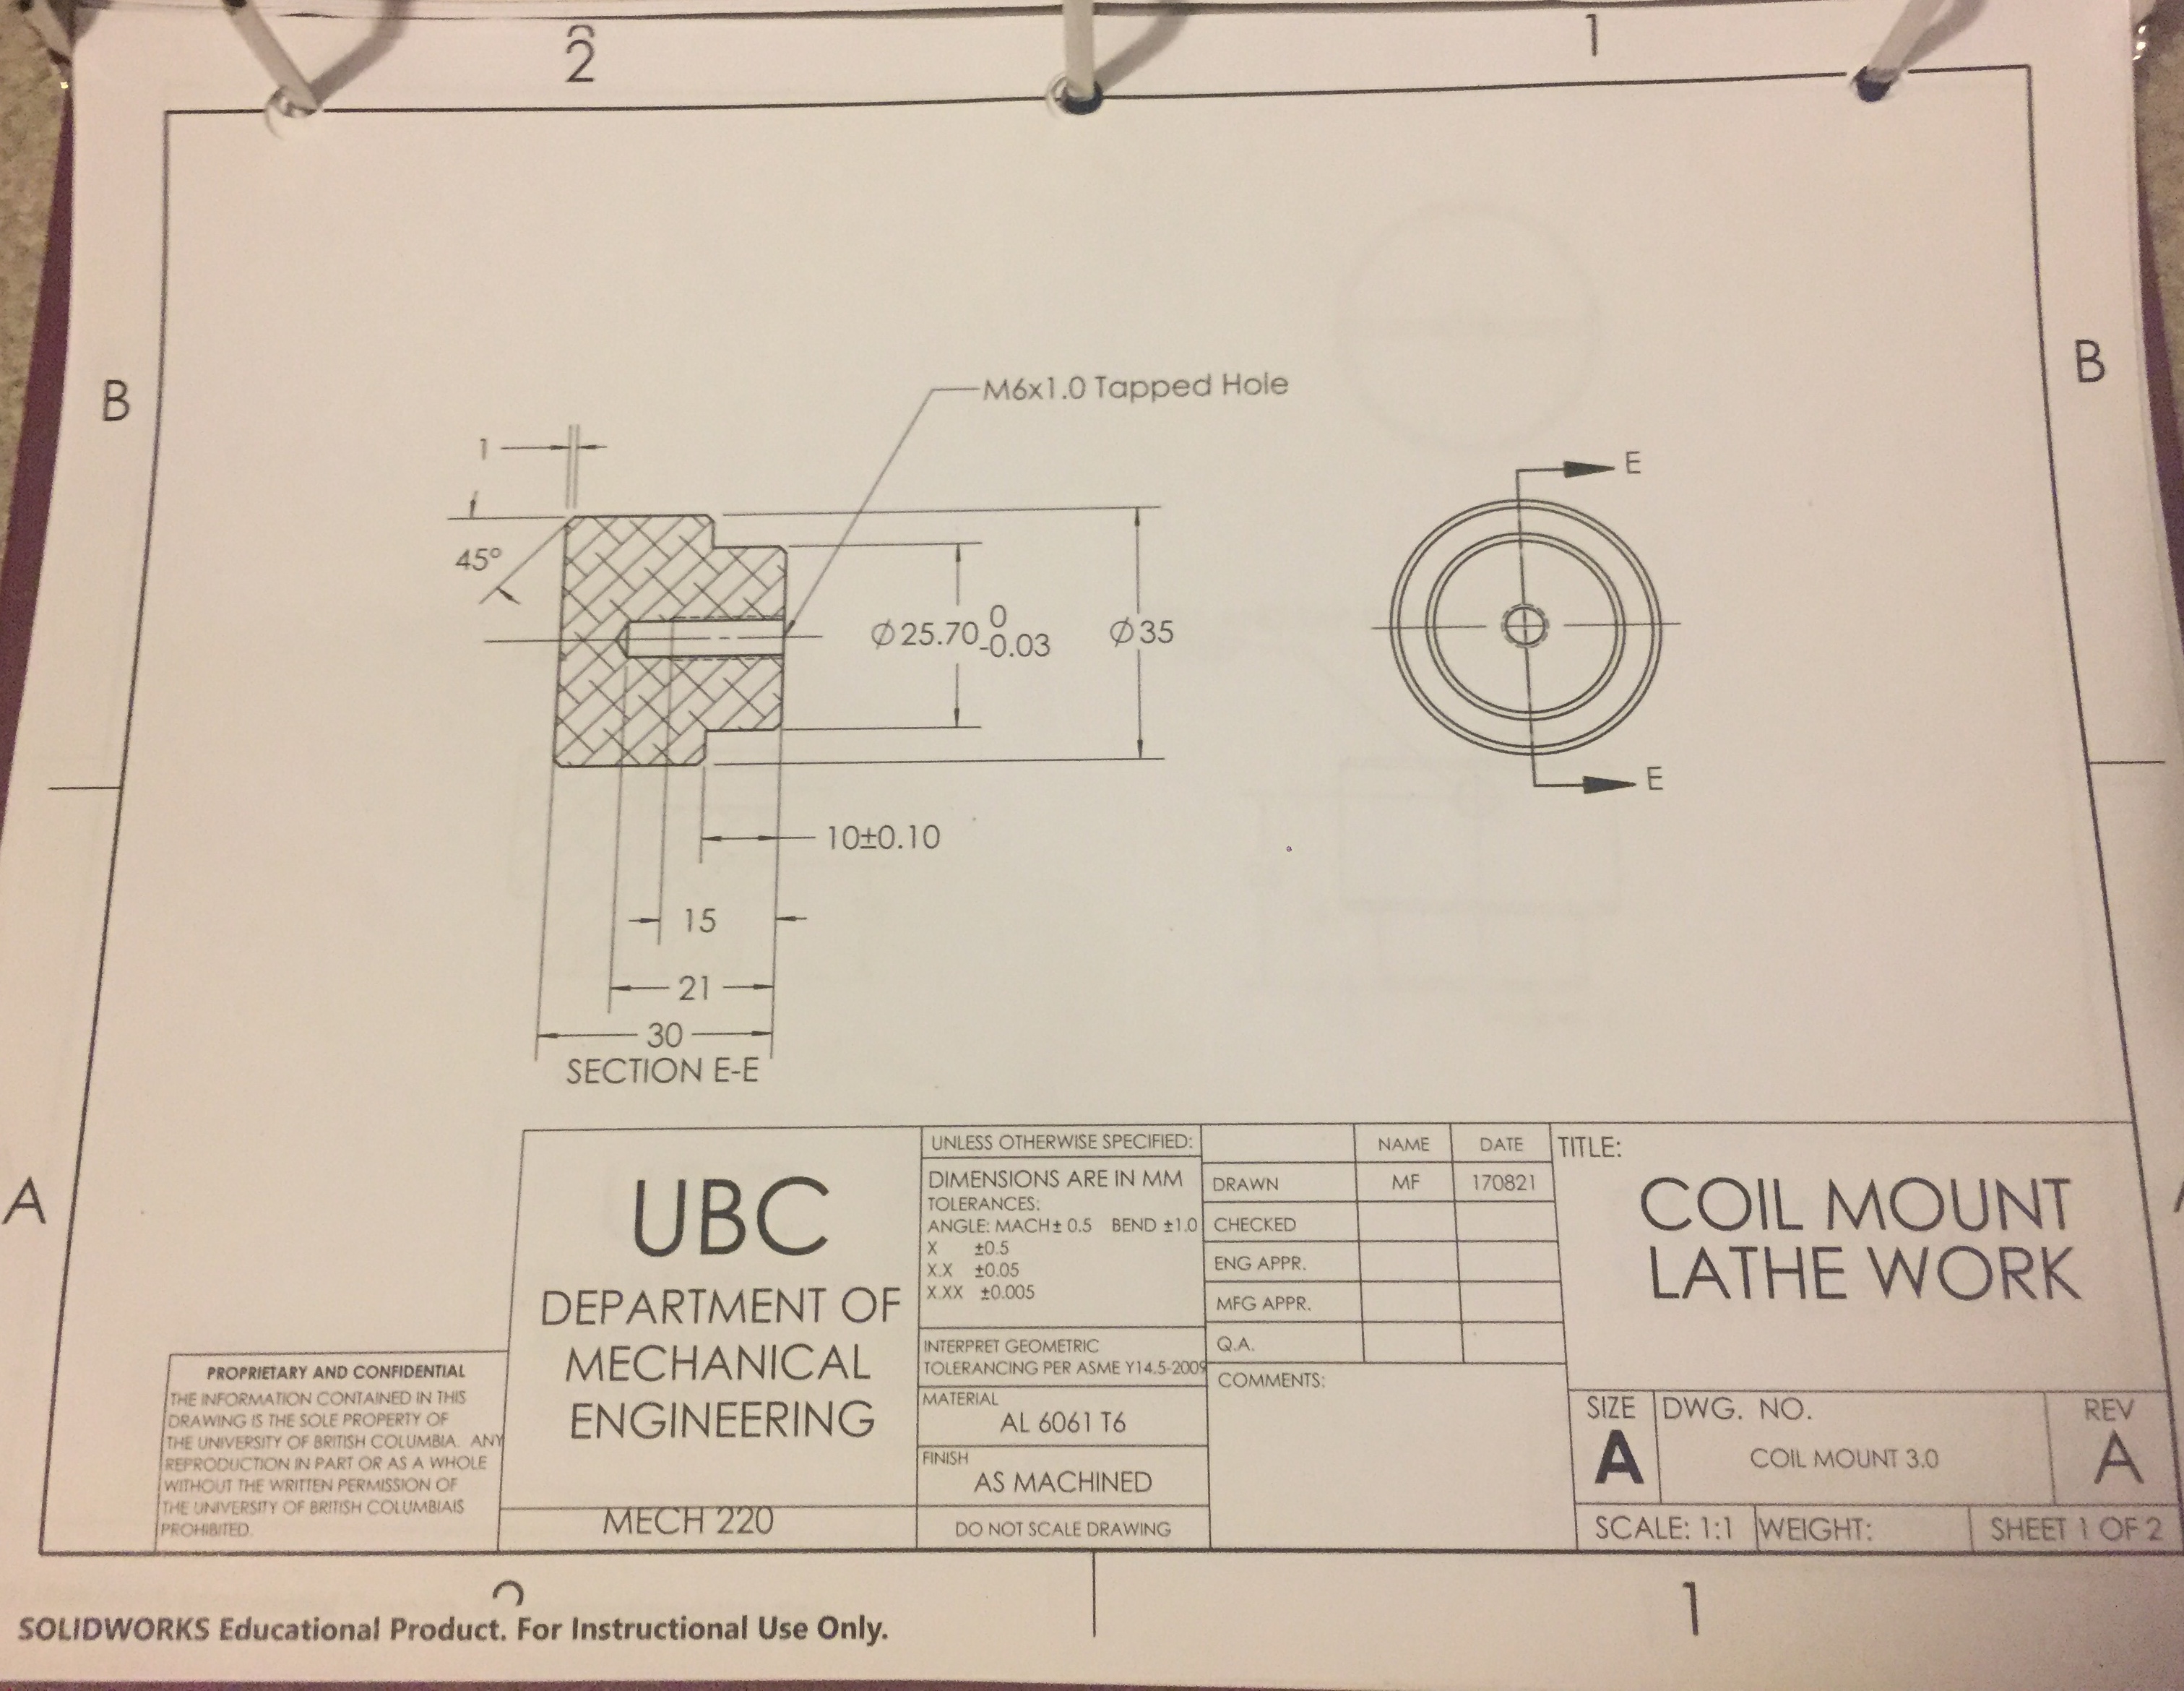
Engineering drawing of part to be machine on lathe
Working on the Lathe
To start off, I was paired with another one of my classmates to share a bench lathe.
I clamped the aluminum stock in the chuck of the lathe and properly machined the part within the tolerances, according to the drawing on the right.
Working on the Mill
After machining the previous part on the lathe, I moved oon to the milling machine to produce the PCB mount.
There were a few challenging parts, such as ensuring the center slot was positioned correcty, but the part was machined within tolerances.
After using the mill, I used a sheet metal brake to bend the outer shell into the proper shape, then further spot welding the upright part onto the shell.
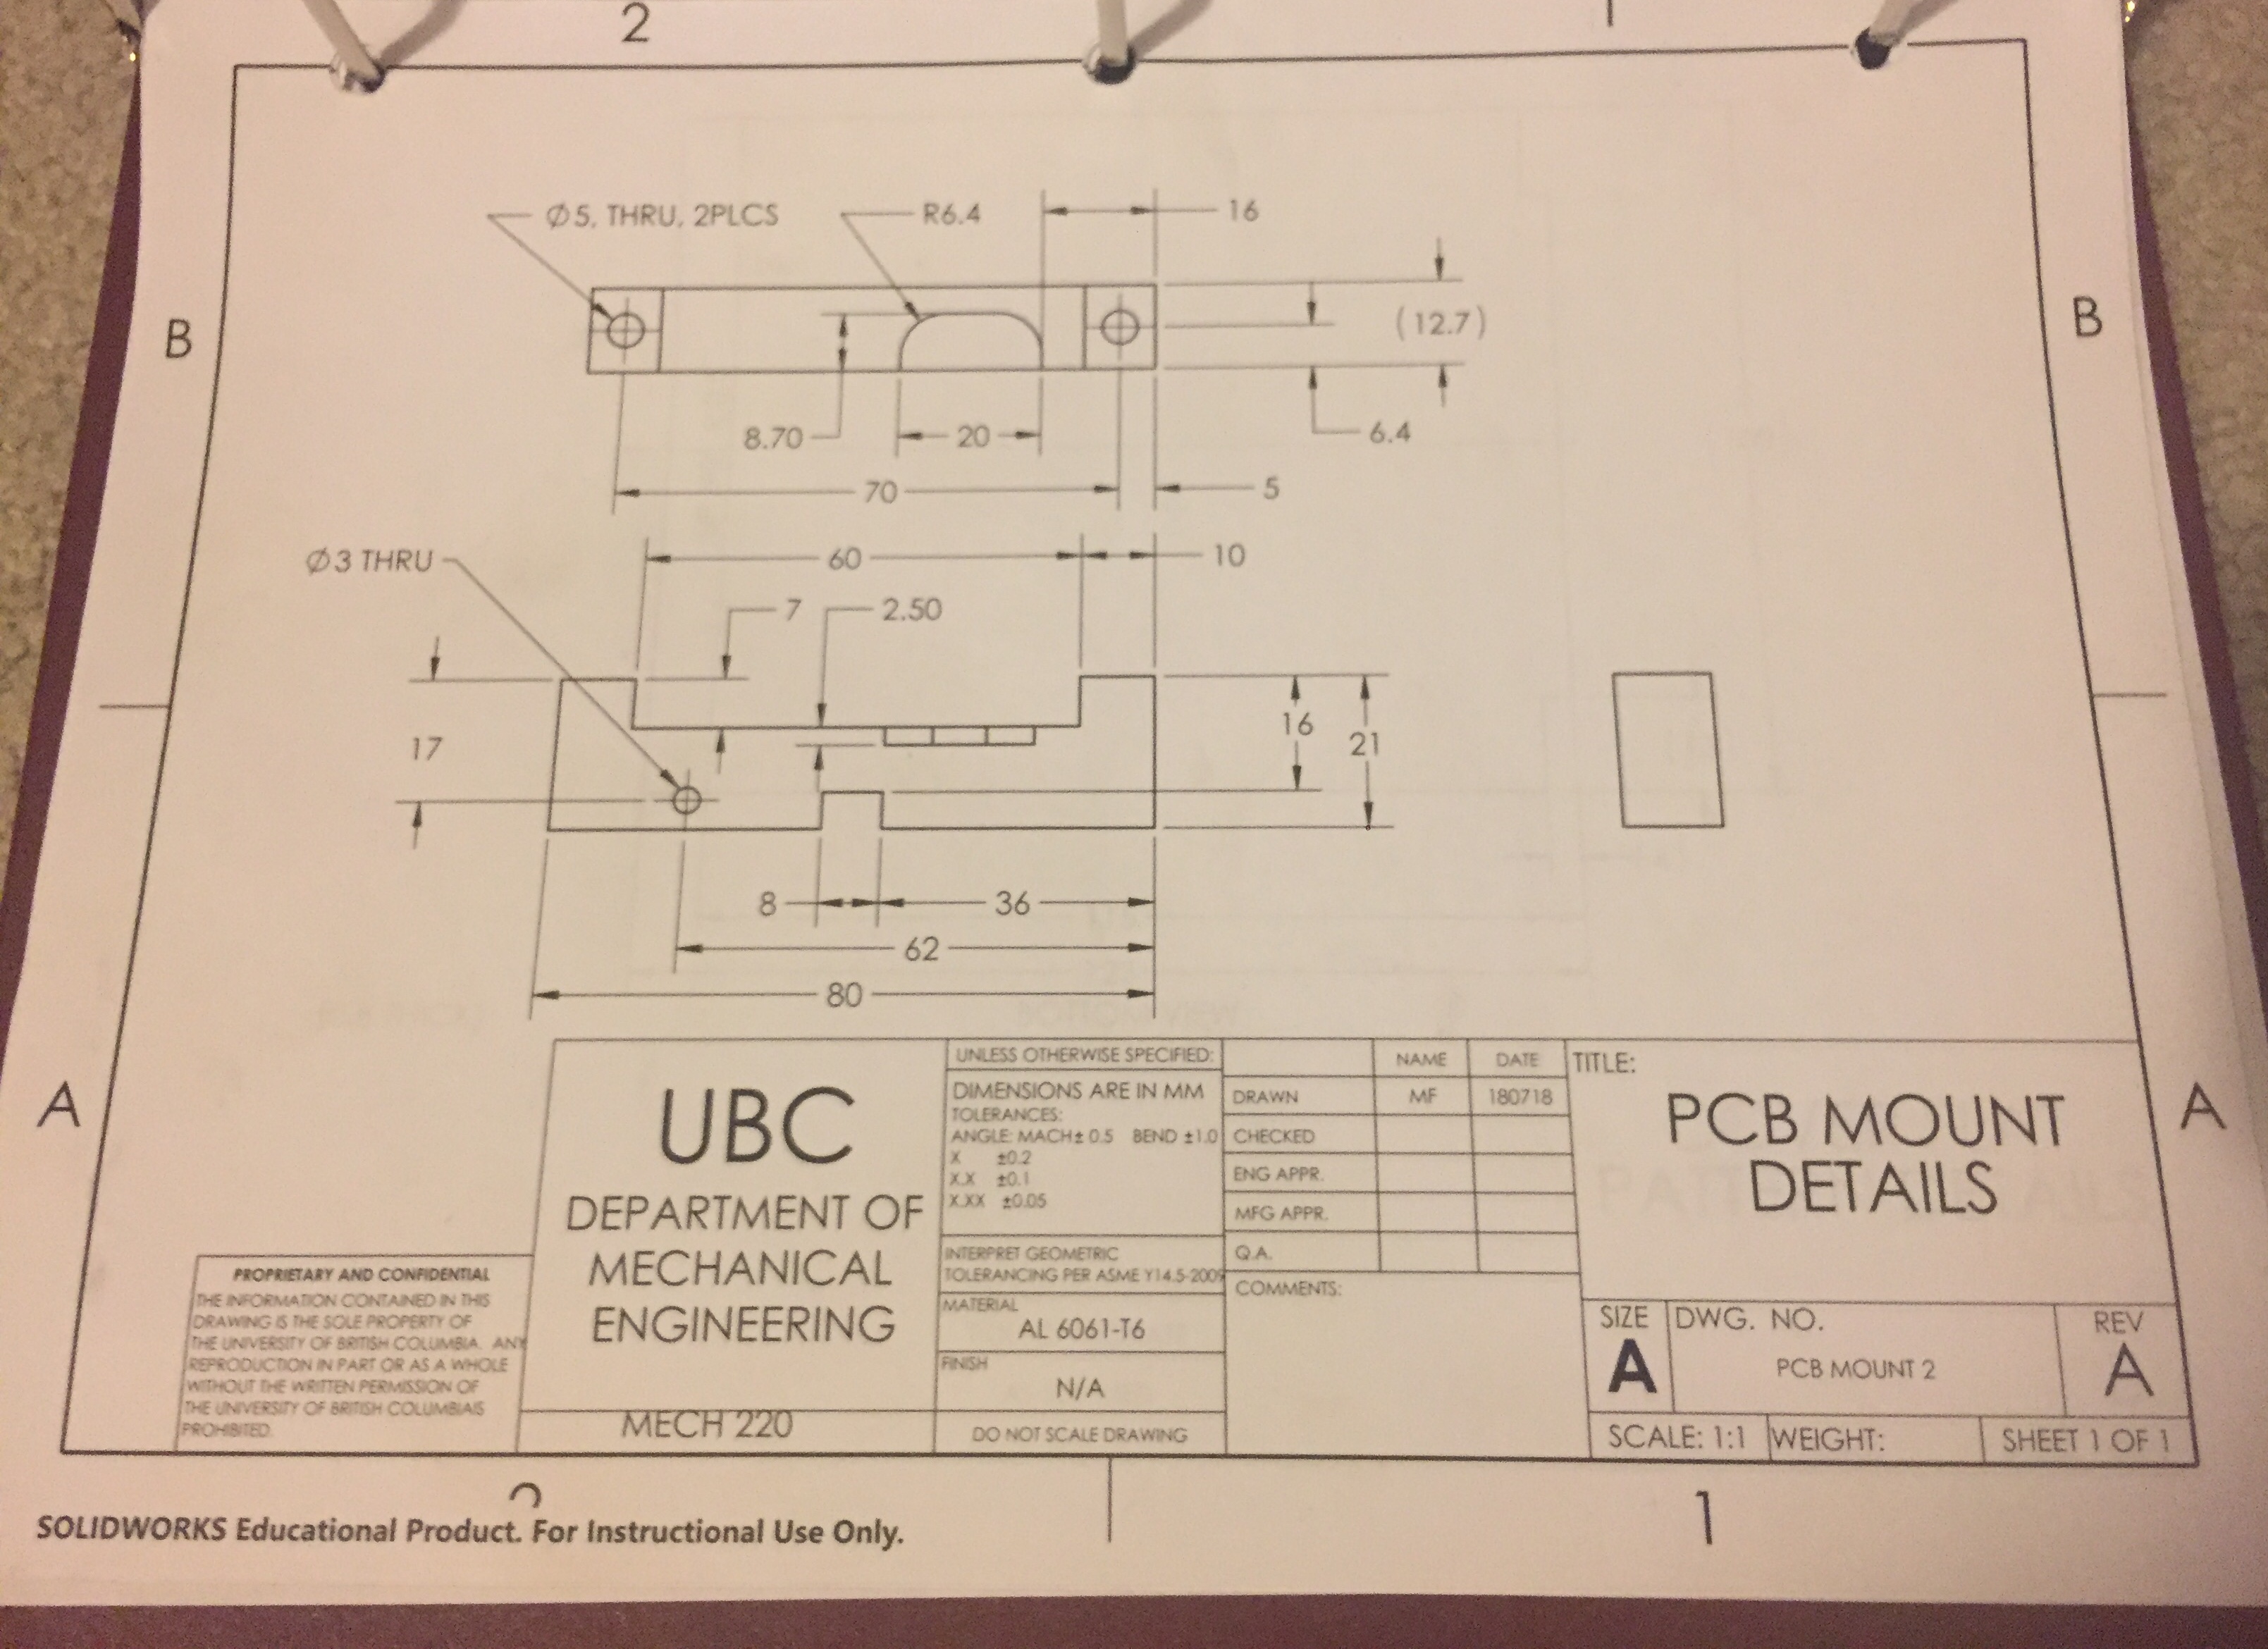
Engineering drawing of part to be machined on mill
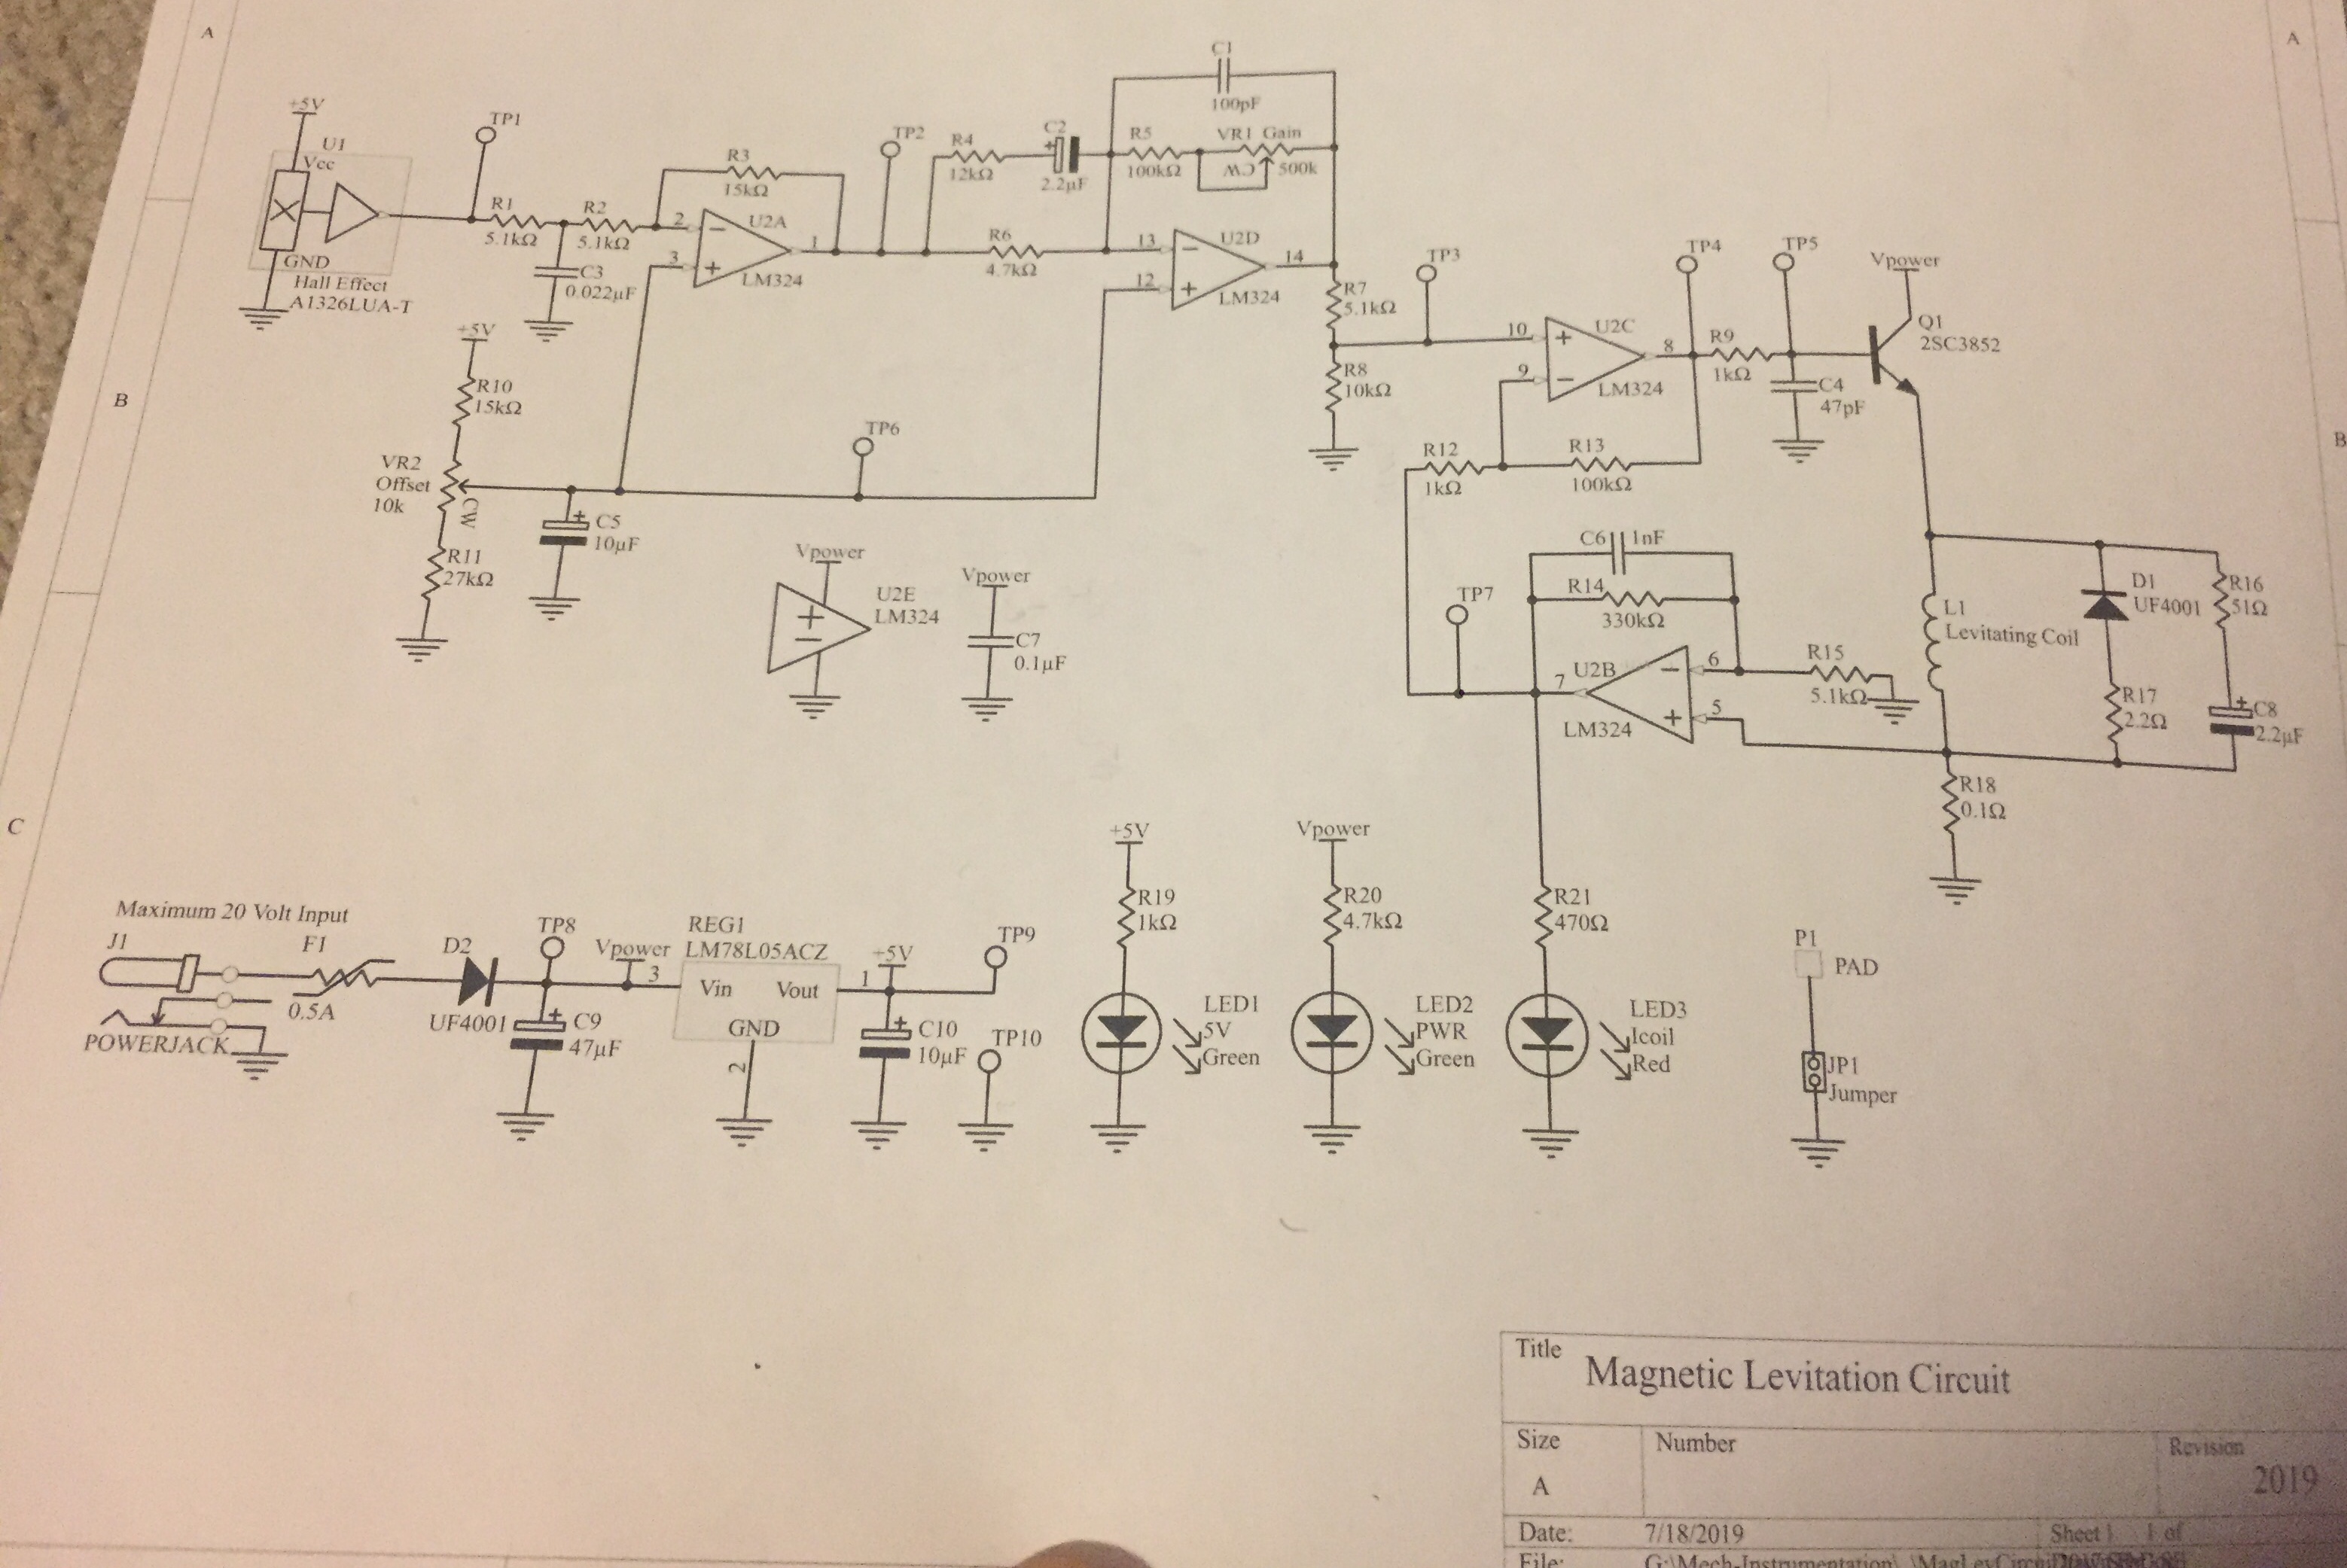
MagLev circuit diagram
Reading Circuit Diagram and Placing Components
After the machining part of the project was complete, I moved onto the electrical assembly of the MagLev ciruit (shown on the right).
I read off the components from the diagram and figured out where they needed to be placed on the PCB diagrams shown below.
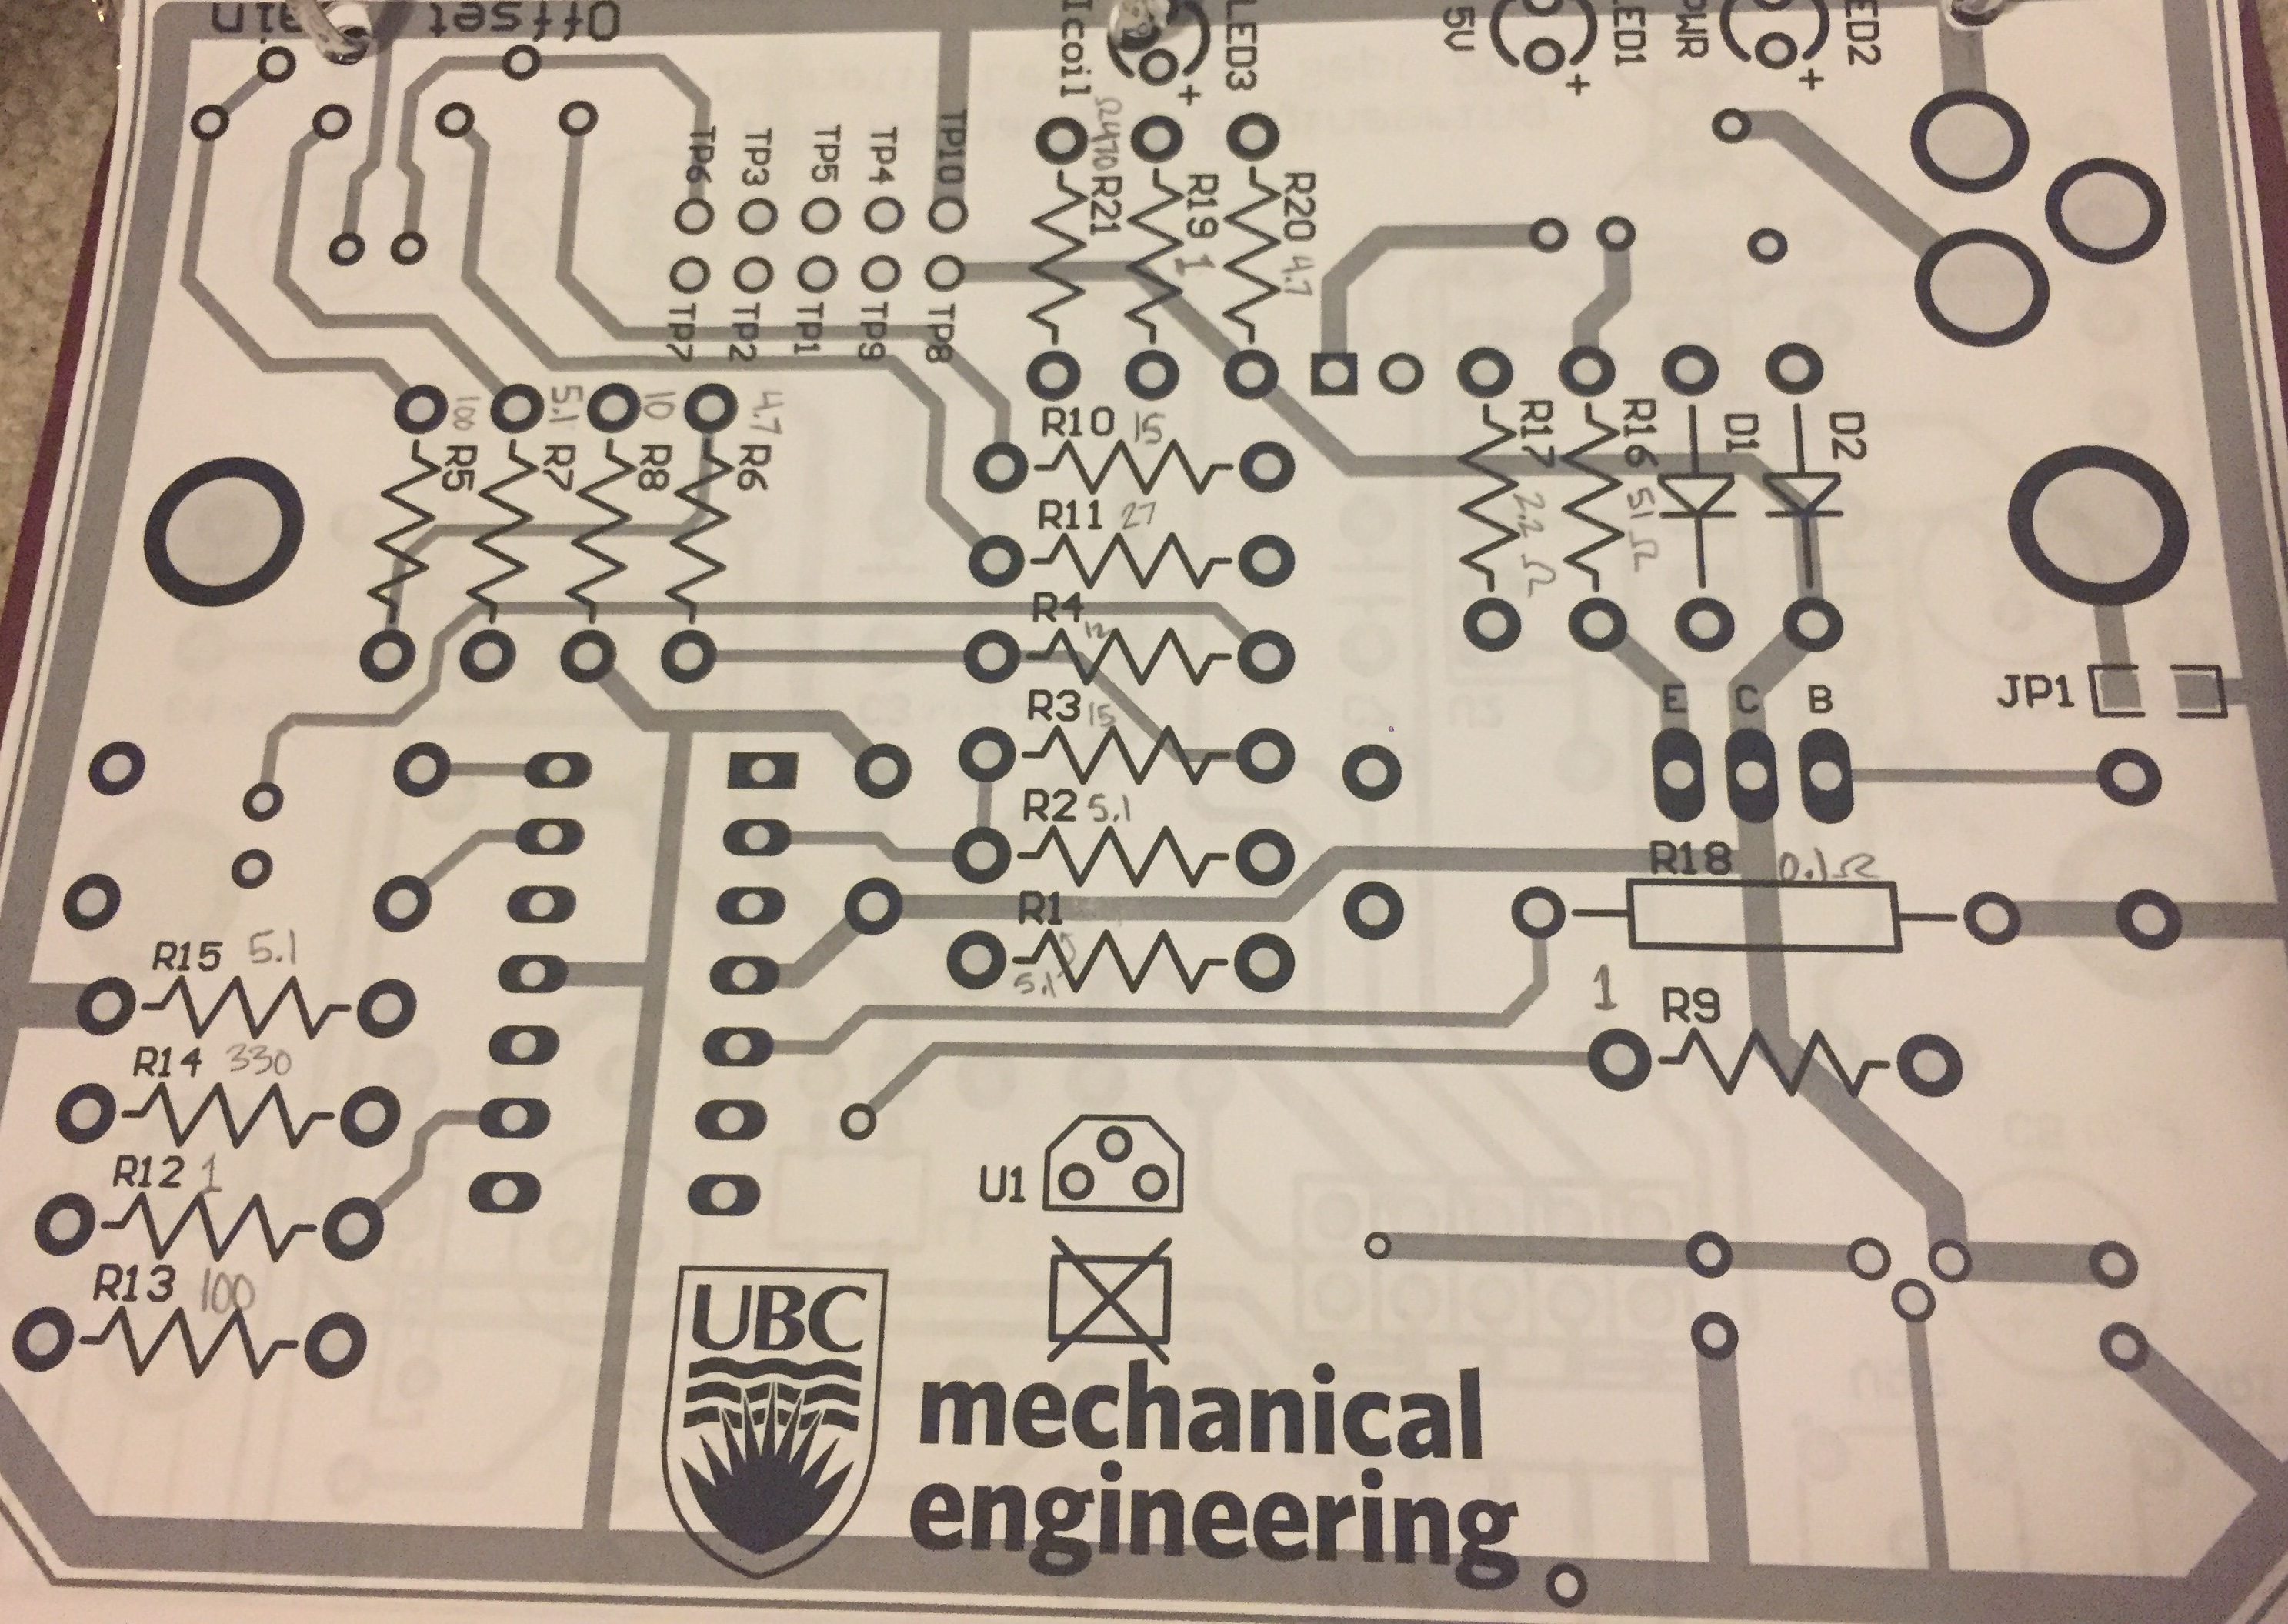
PCB diagram front
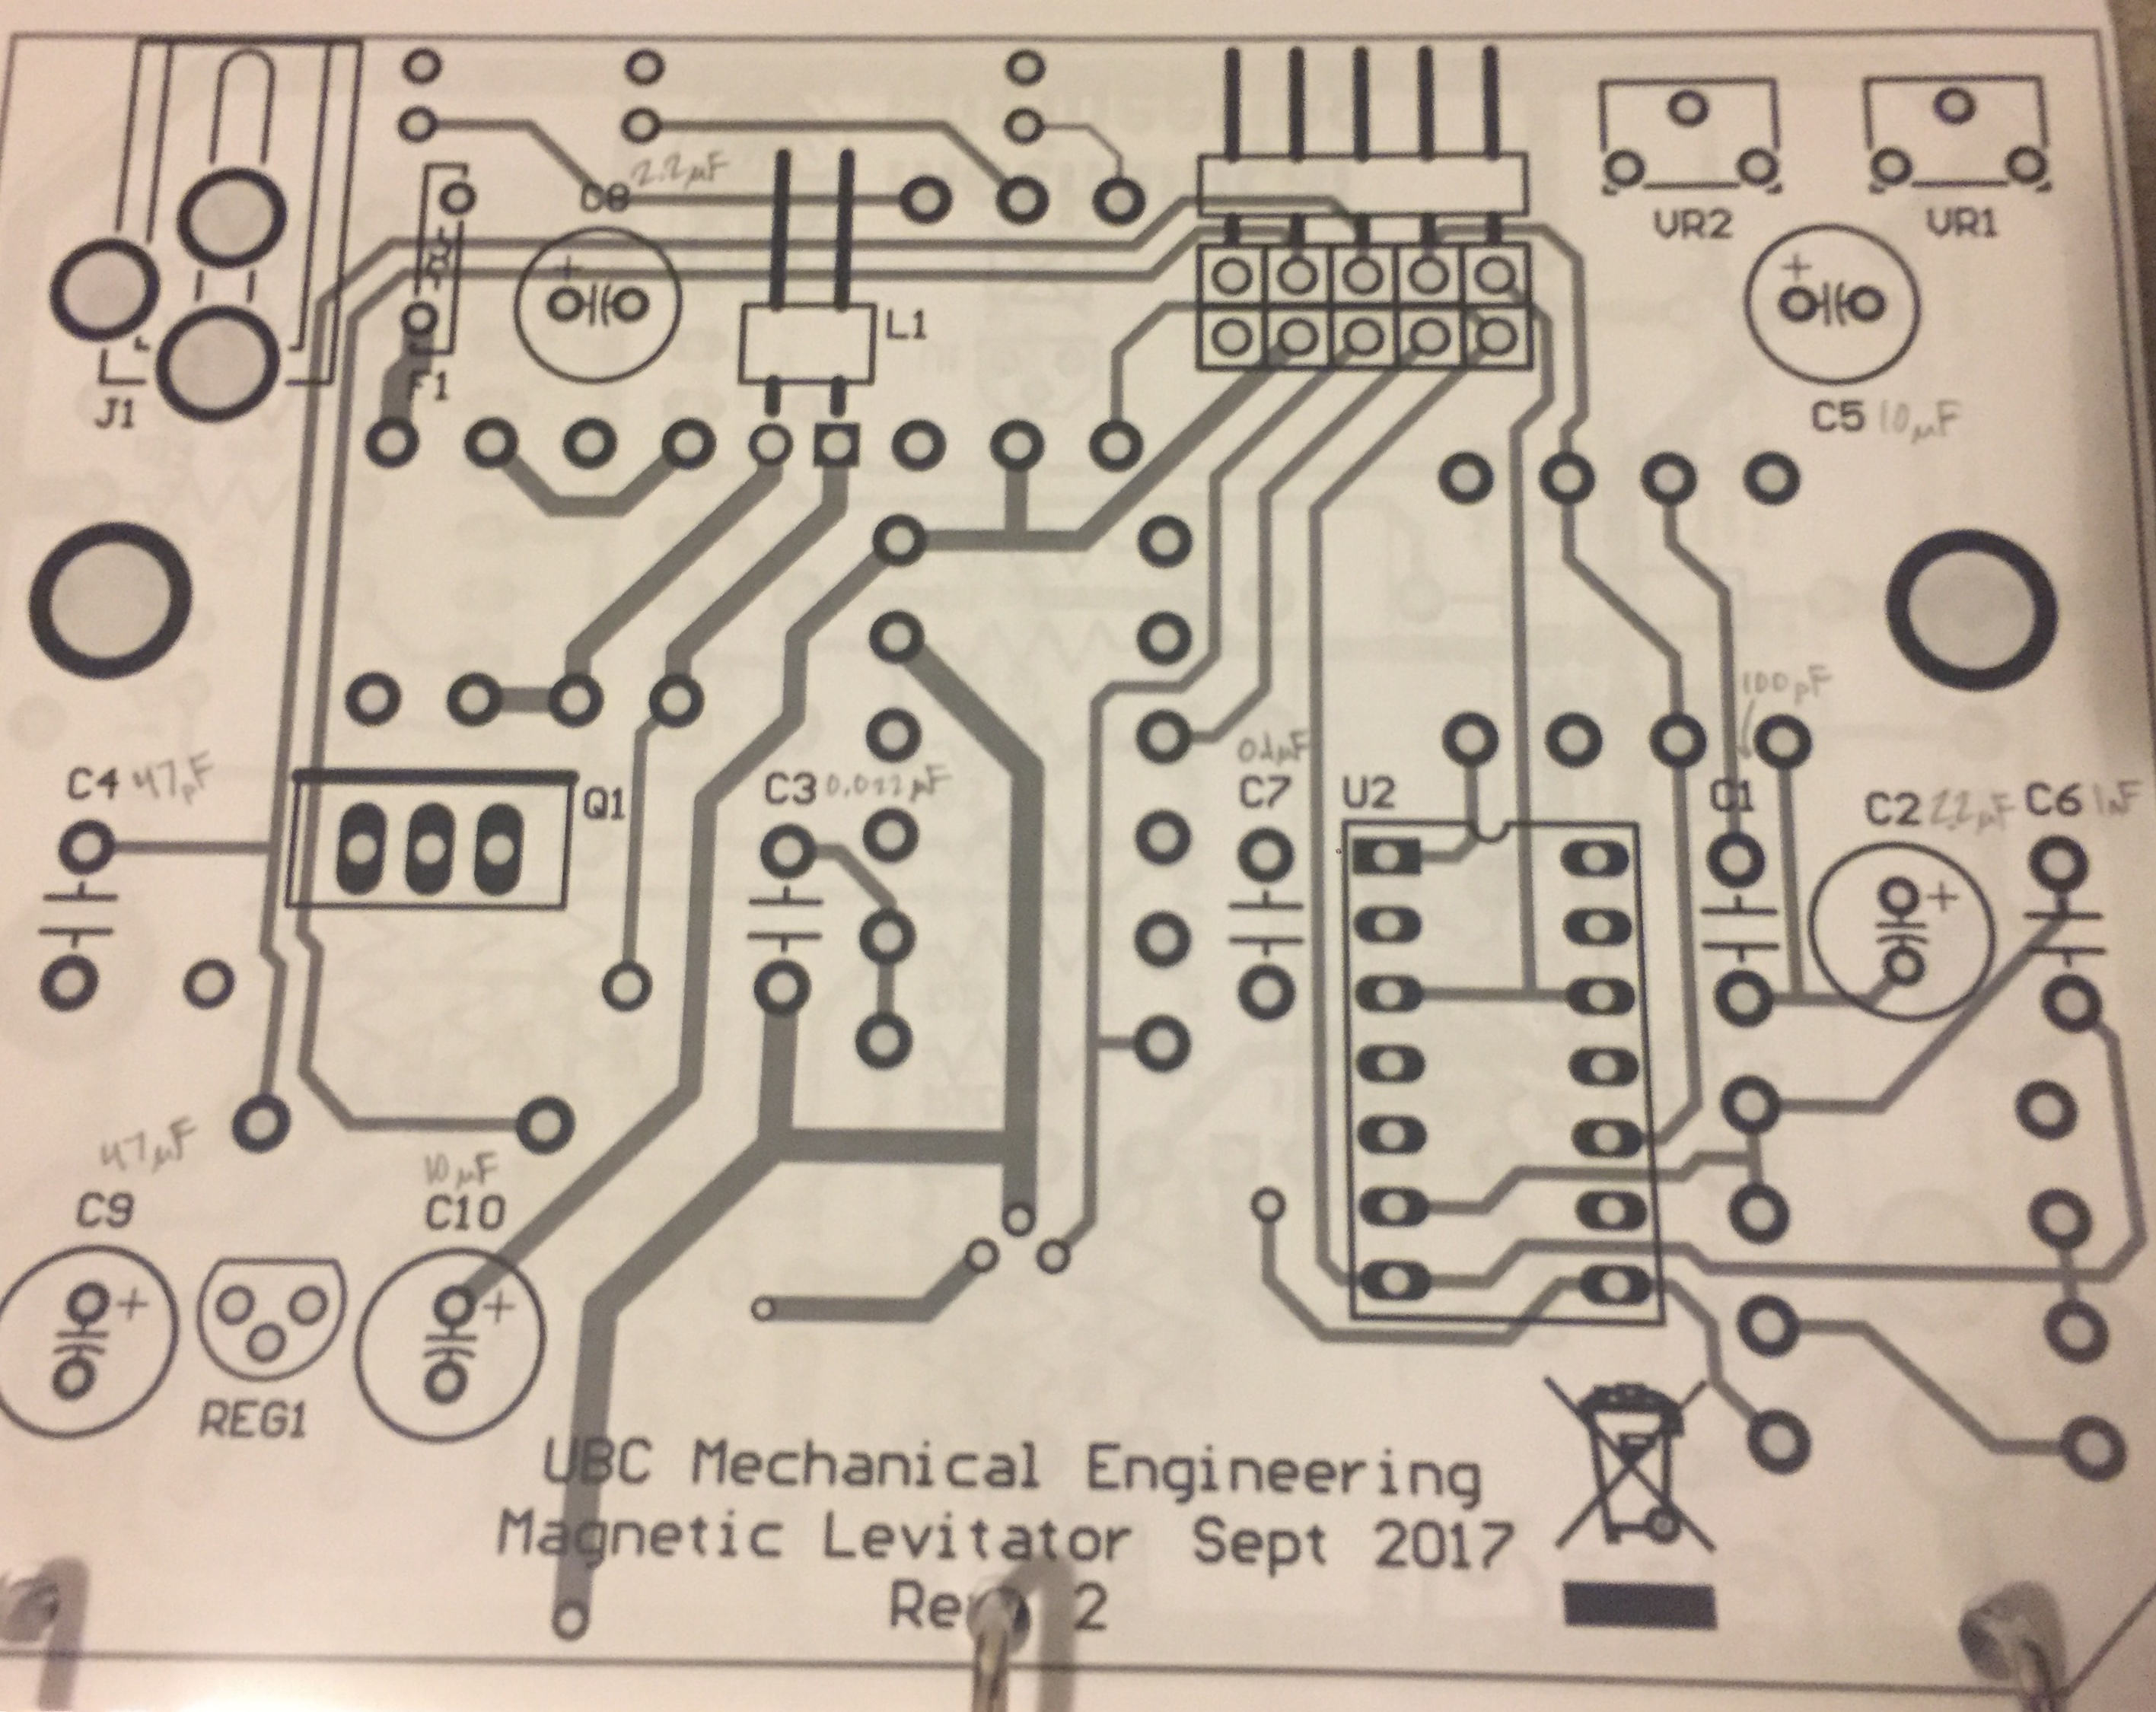
PCB diagram back
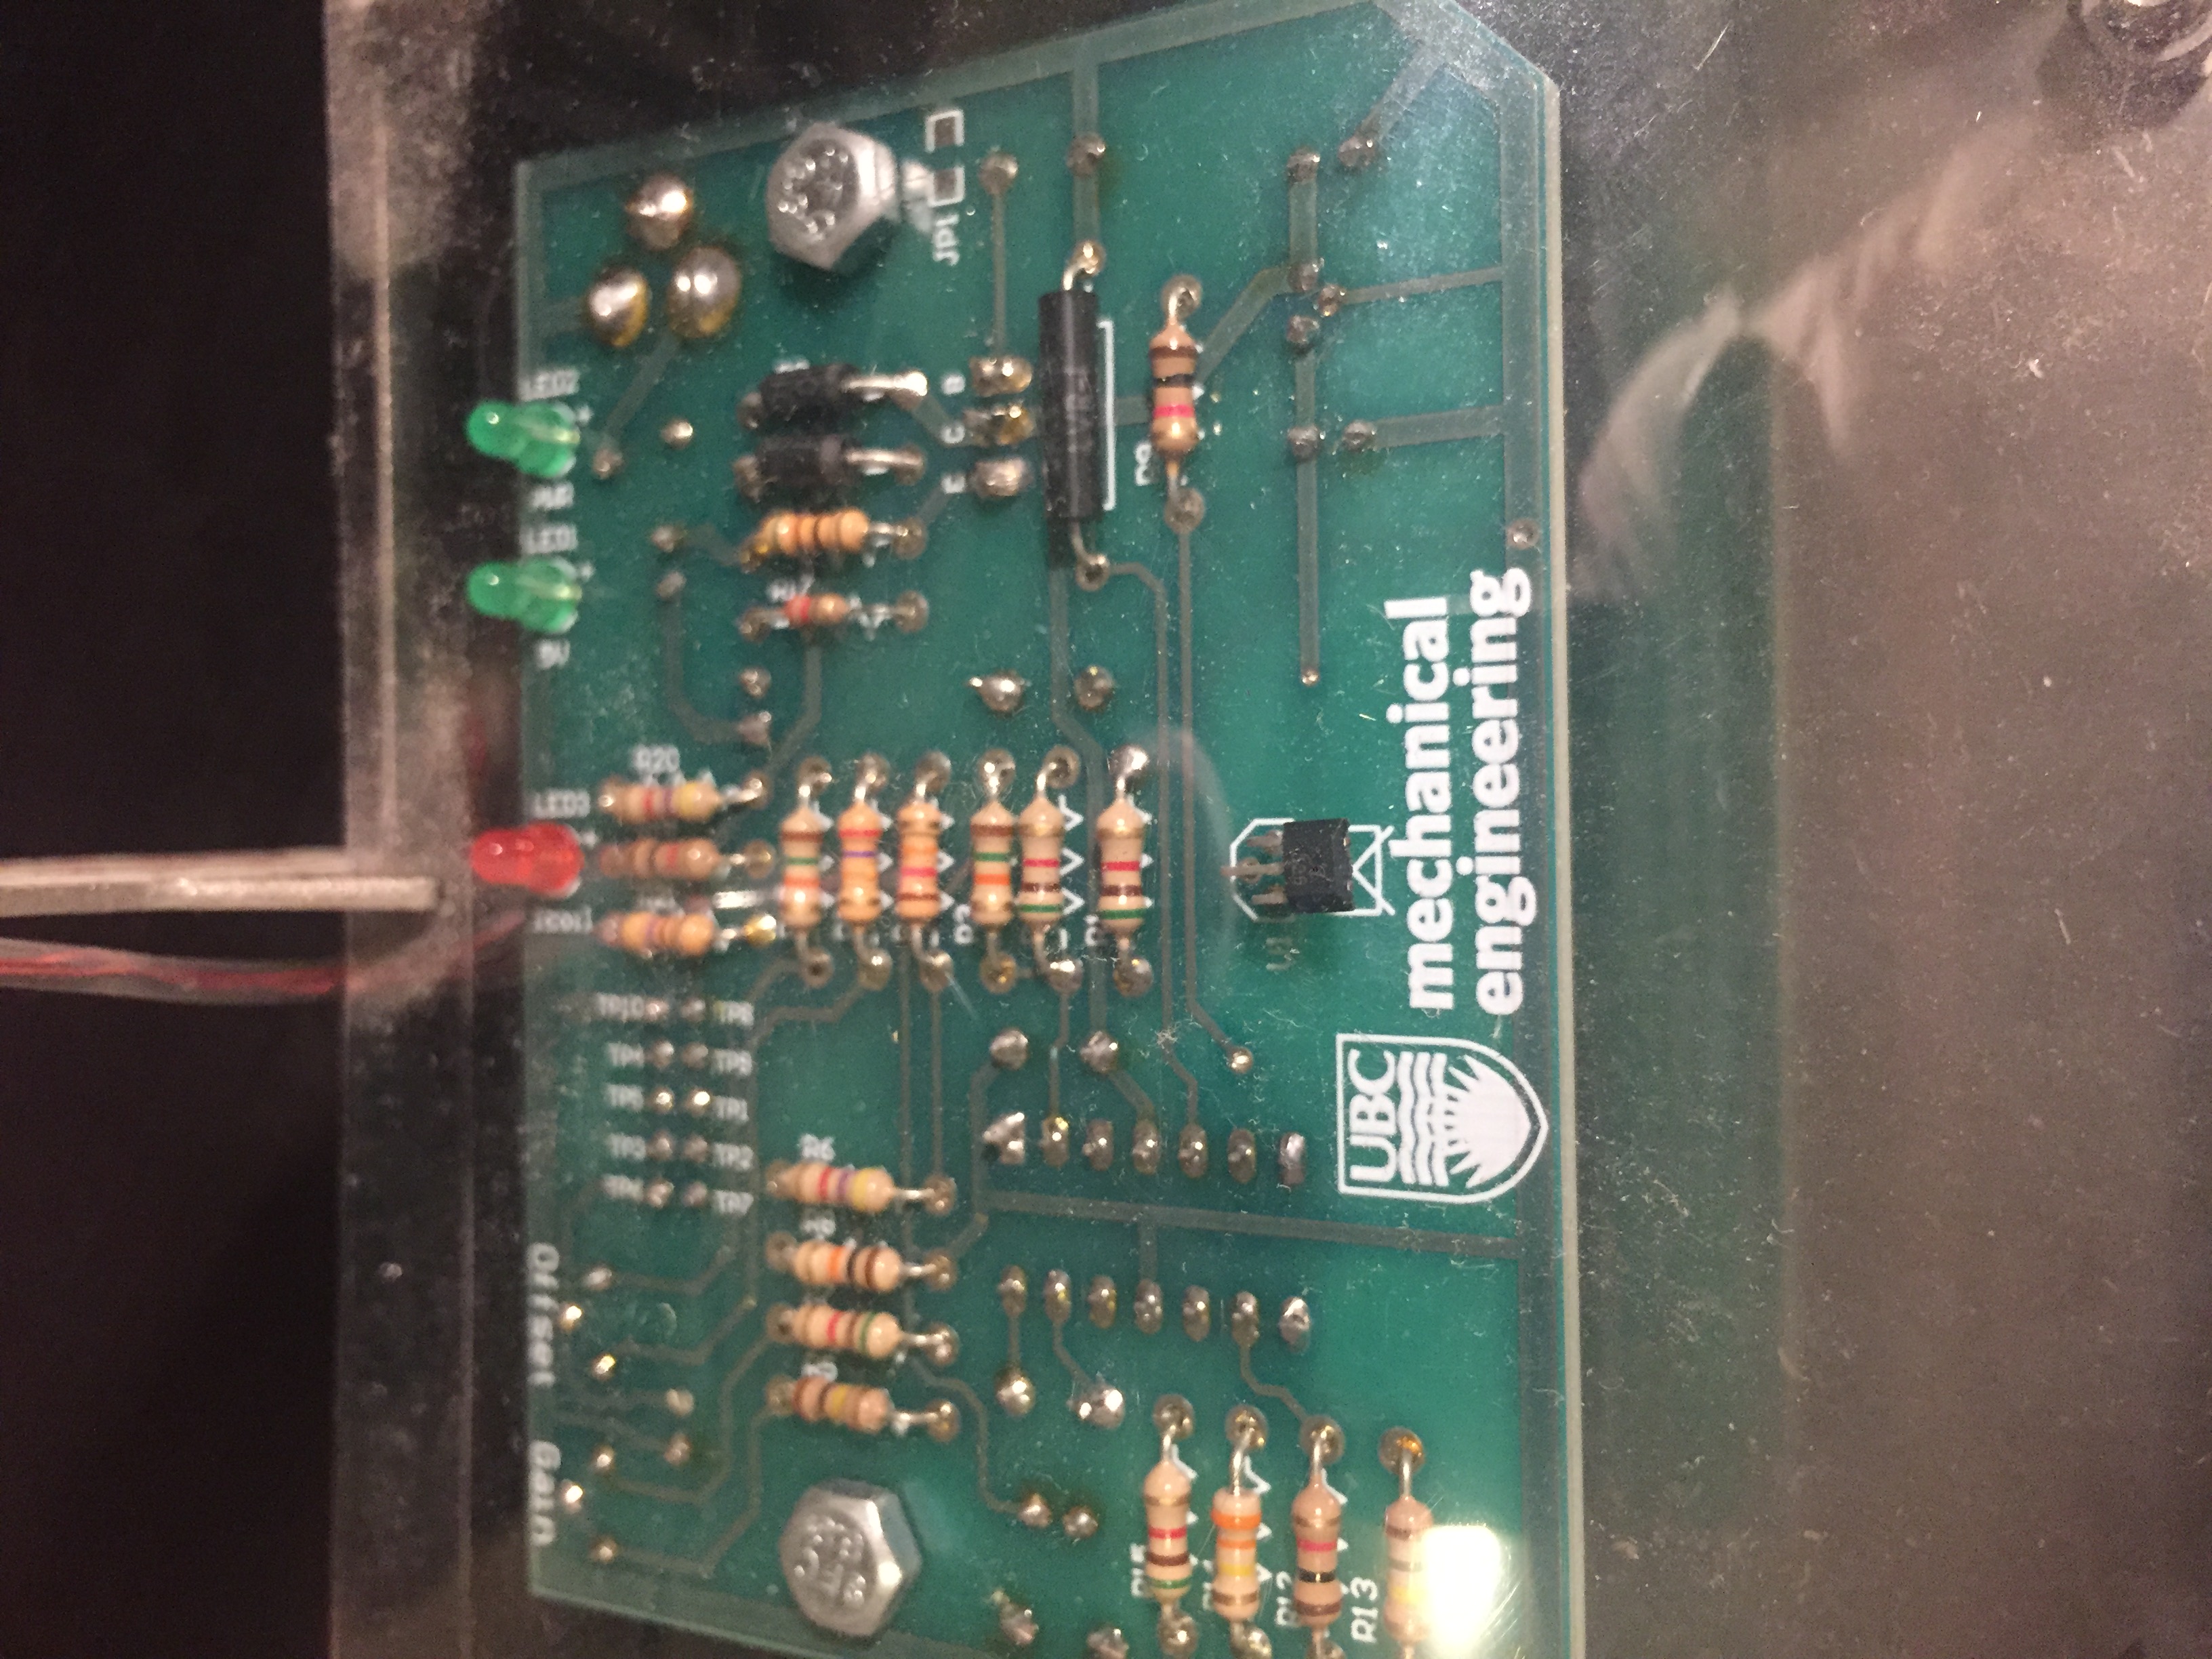
Soldering Components and Troubleshooting
After figuring out where all the components needed to be, I began soldering them to the PCB. The completed PCB is shown on the left.
When the circuit was completed and assembled into the device, I began testing it. I ran into the problem of it running for several seconds then shutting off.
I went into the electrical lab to check the circuit and I found one of the transistor leads short circuiting onto another. I trimmed the leads down and it worked properly.
Completed PCB
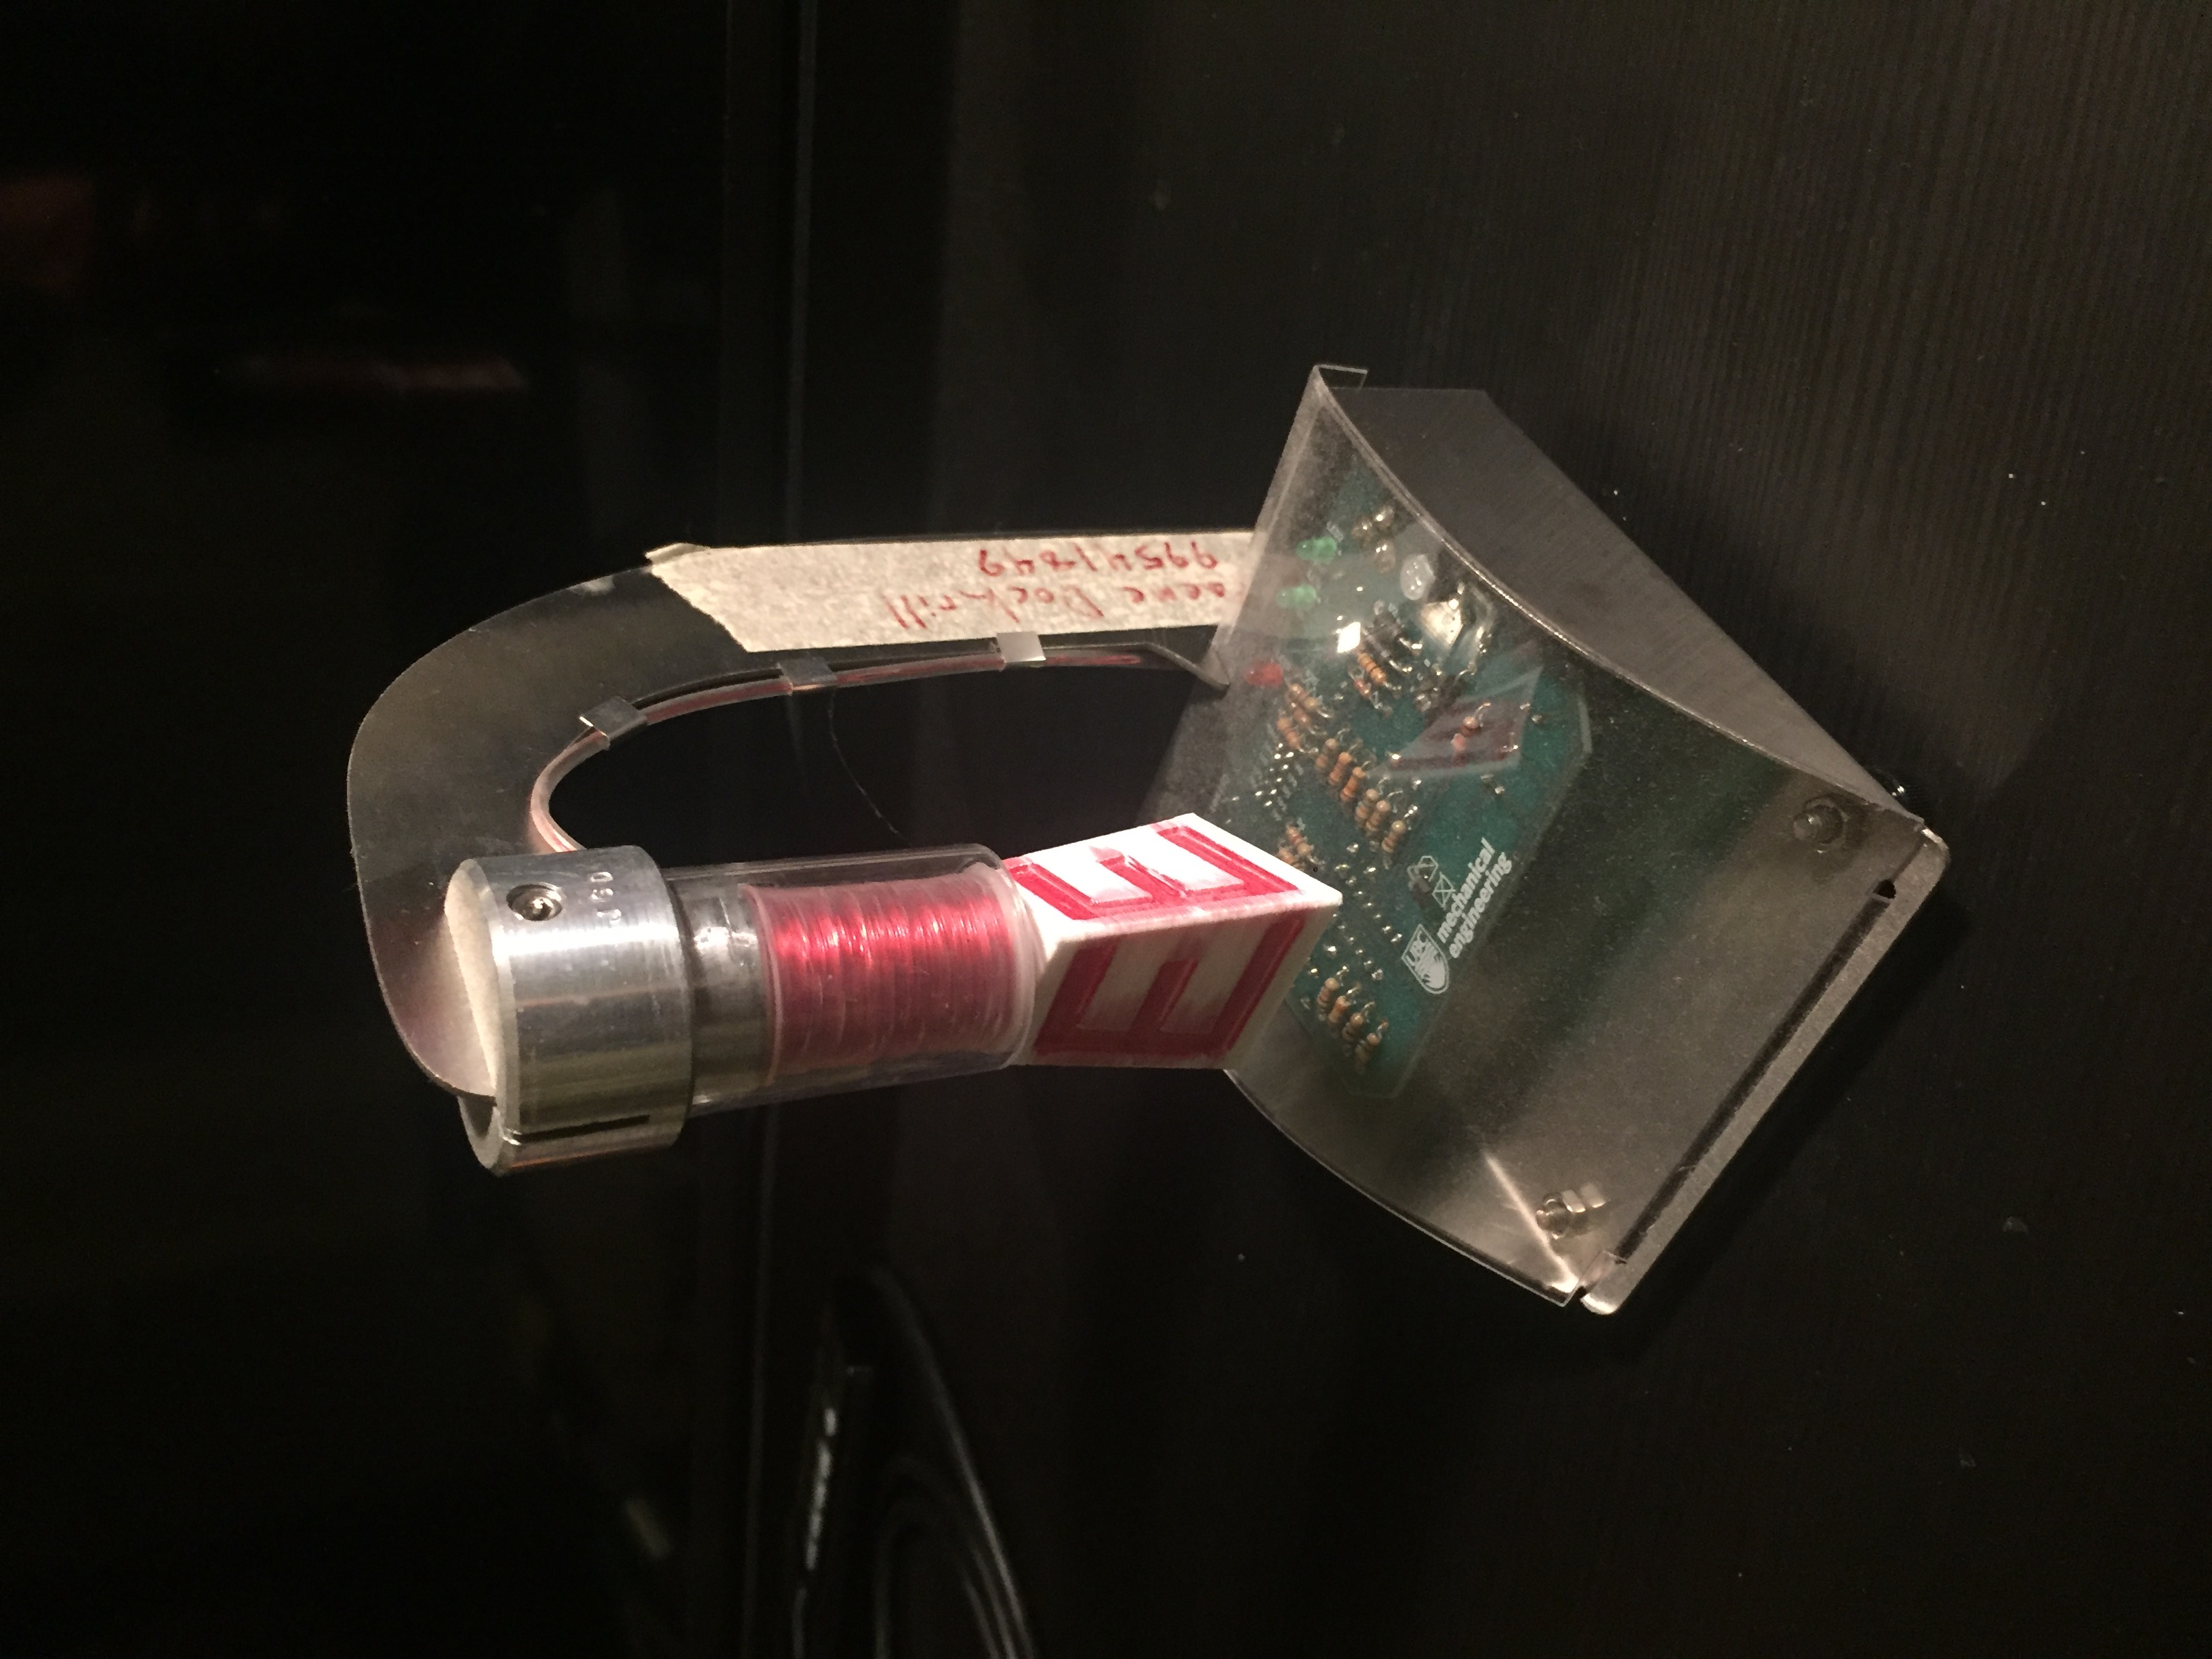
Final MagLev front view
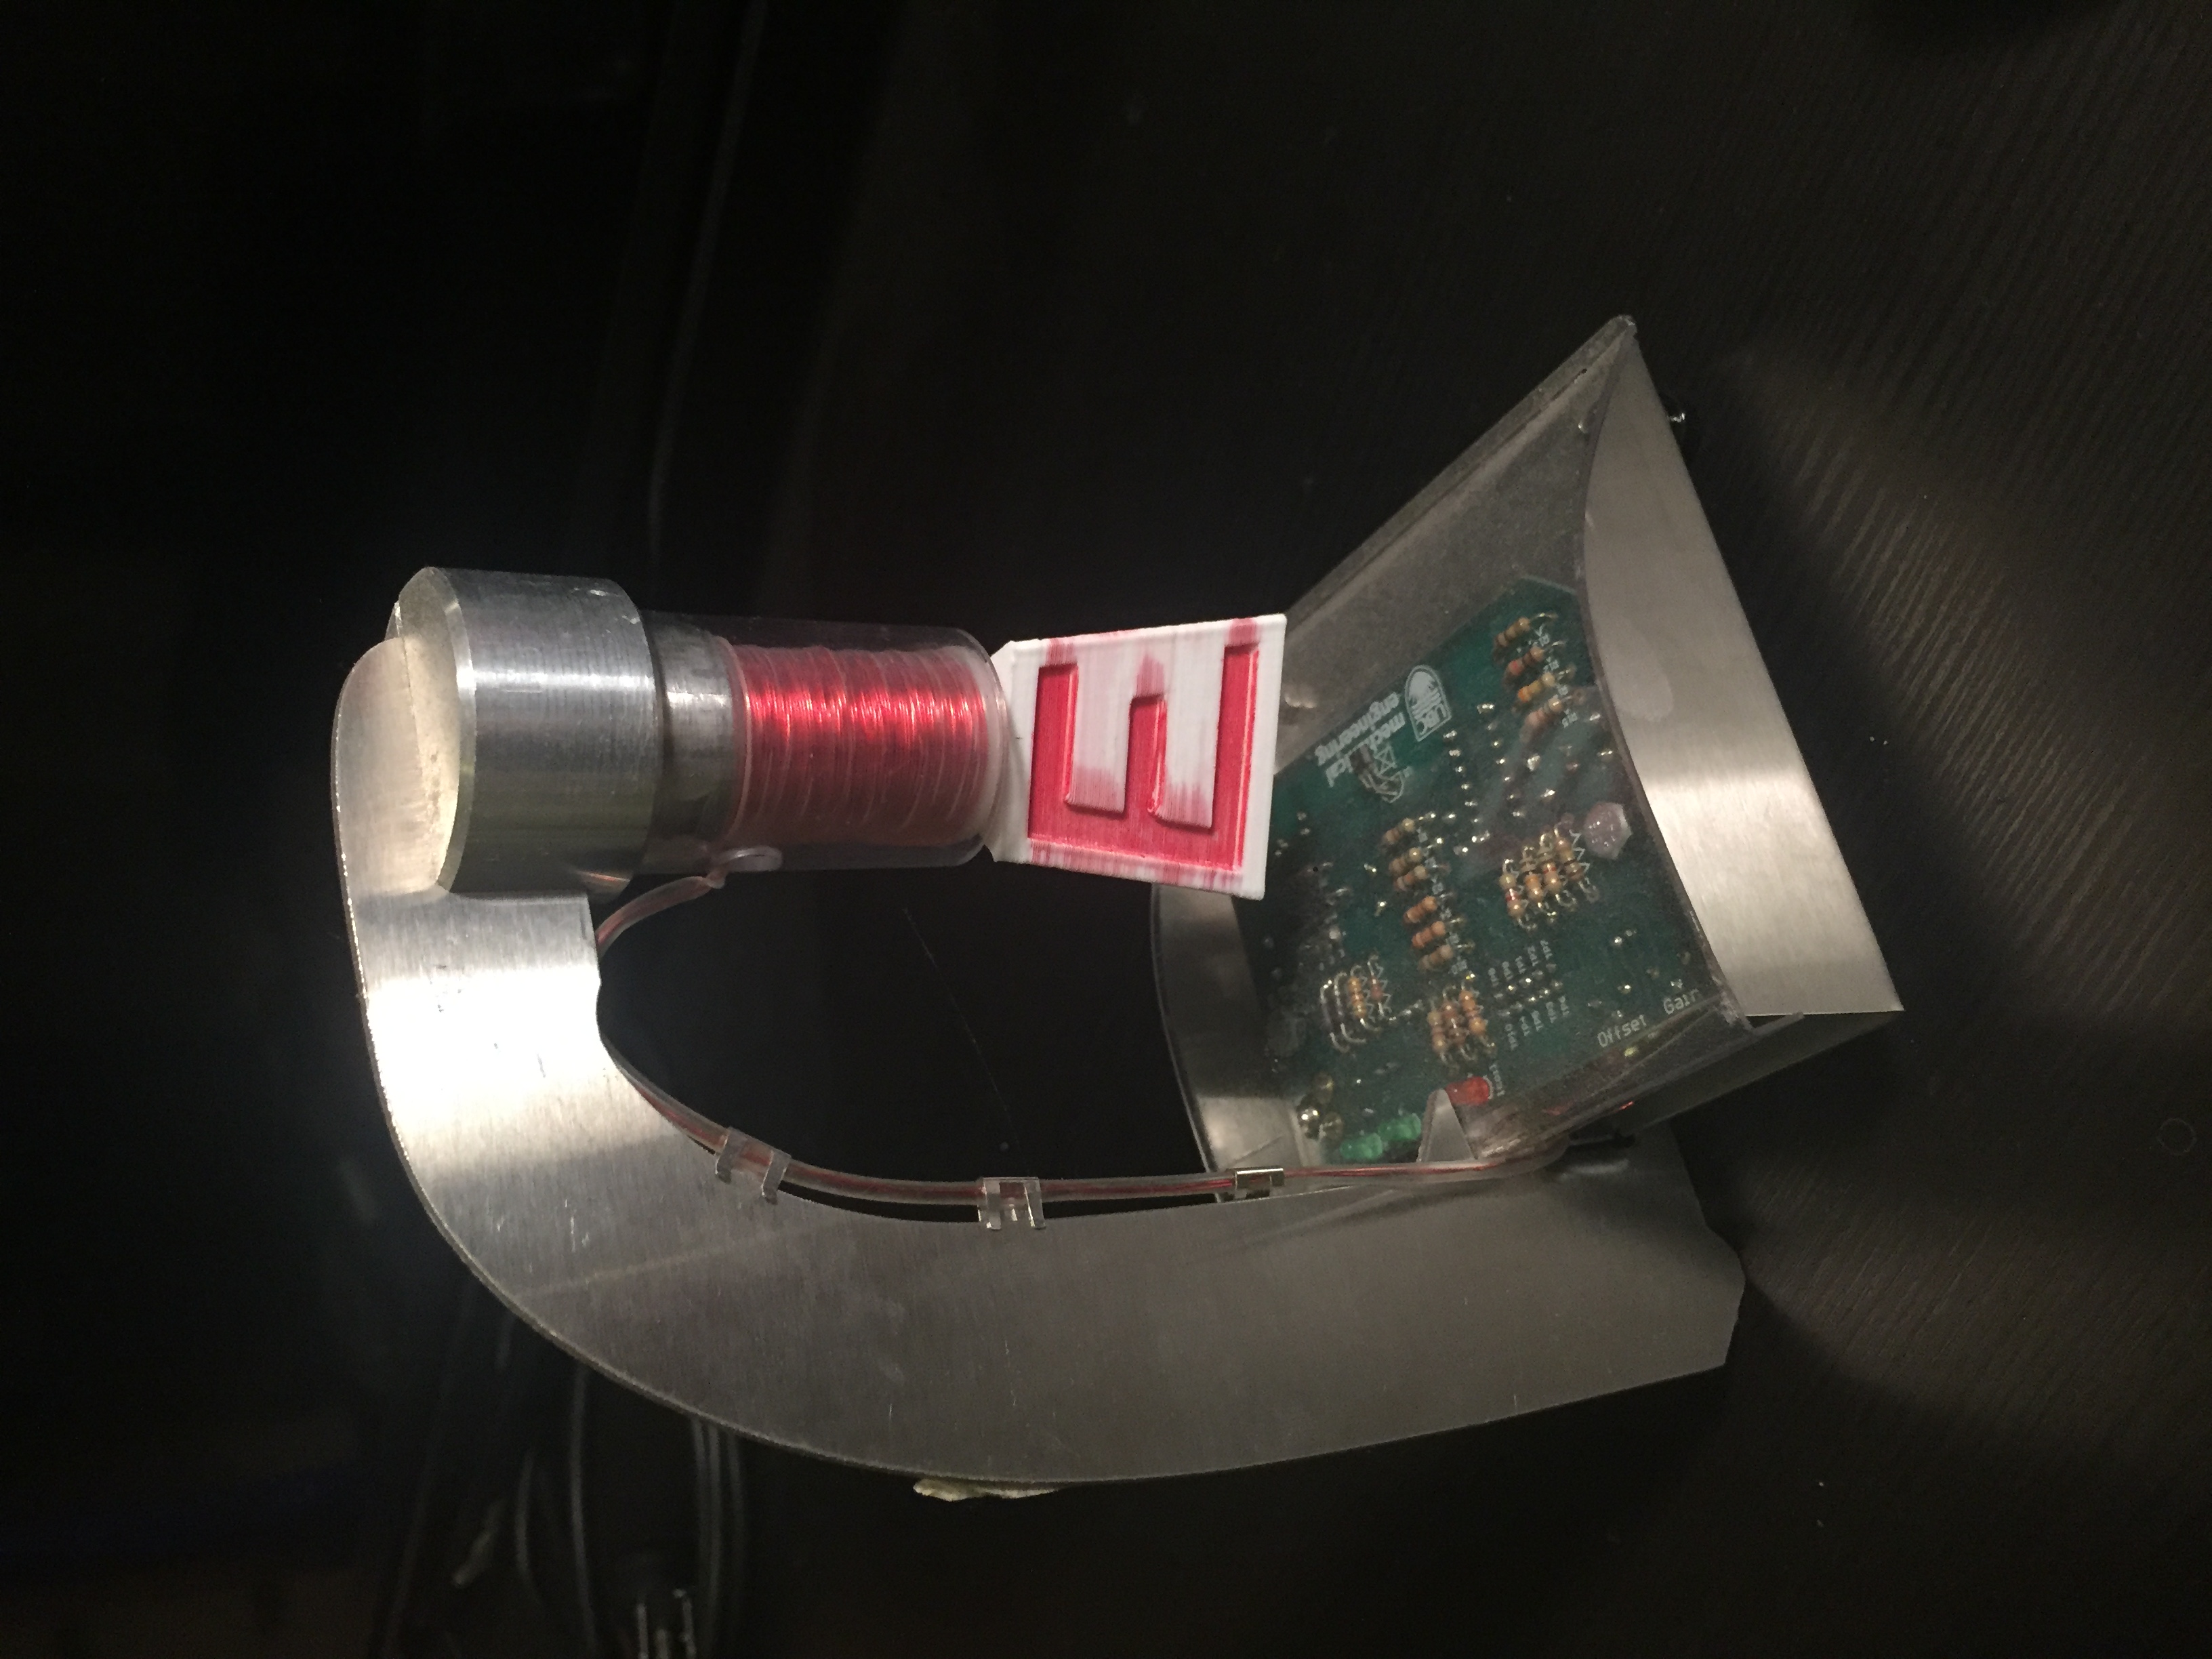
Final MagLev back view
Final Remarks
After the project was completed, it was assesed by my professors and I scored a high grade on the project. There is something I would do differently, however.
I would take more care while soldering the circuit and make sure to trim the excess leads down to prevent any short circuiting.